
Finding the perfect recliner for your body can take years of searching if you are patient. Most of us just go ahead and purchase the most comfortable recliner we can find in the nearest furniture store and hope our body and the chair adapt accordingly to one another.
This is why you need to think twice about tossing your recliner in the trash just because the back of it is not working properly.
It can take years to break in a recliner so it molds to your body. Don’t ruin that relationship by giving up on it just because it needs a little work.
And the best part is, you can fix it yourself!
In This Article We'll Discuss
Narrow Down the Problem
Just like you can’t just bring your car to the mechanic and say it is broken, you need to narrow down the problem you are having with the back of your recliner. Think specifically about what it is that is giving you issues at the moment.
As an example, here are some problems you may be having with the recliner chair back.
- The back of the chair is too loose and shifts around considerably.
- The back of the chair does not lean far enough back.
- The back of the chair has started leaning too far backward.
Don’t Become Overwhelmed
Your recliner is essentially composed of just a few components. For instance, you have the pull handle, footrest, chair back, springs, and a cable. If there is something wrong, it is going to be one of these things (other than the random stain on the material that you can always blame on someone else, but that is just cosmetic anyway).
So when you think about it like that, it doesn’t seem too complicated.
Tools Needed
There is a possibility you will need some of these tools while fixing the recliner back. Again, you may not need all of these tools, but it is better to just have them all in the beginning rather than having to stop and find them as you go along.
- Flashlight
- Screwdriver (flathead and Phillips just in case)
- Adjustable wrench
- WD40 (take care of any squeaks in the process)
Getting Started Removing the Back
To get full access to the back of the chair, lean it all the way forward until the back of the chair is pointing straight up at the ceiling. This gives you a full view of what you will need to do to take the back of the chair off.
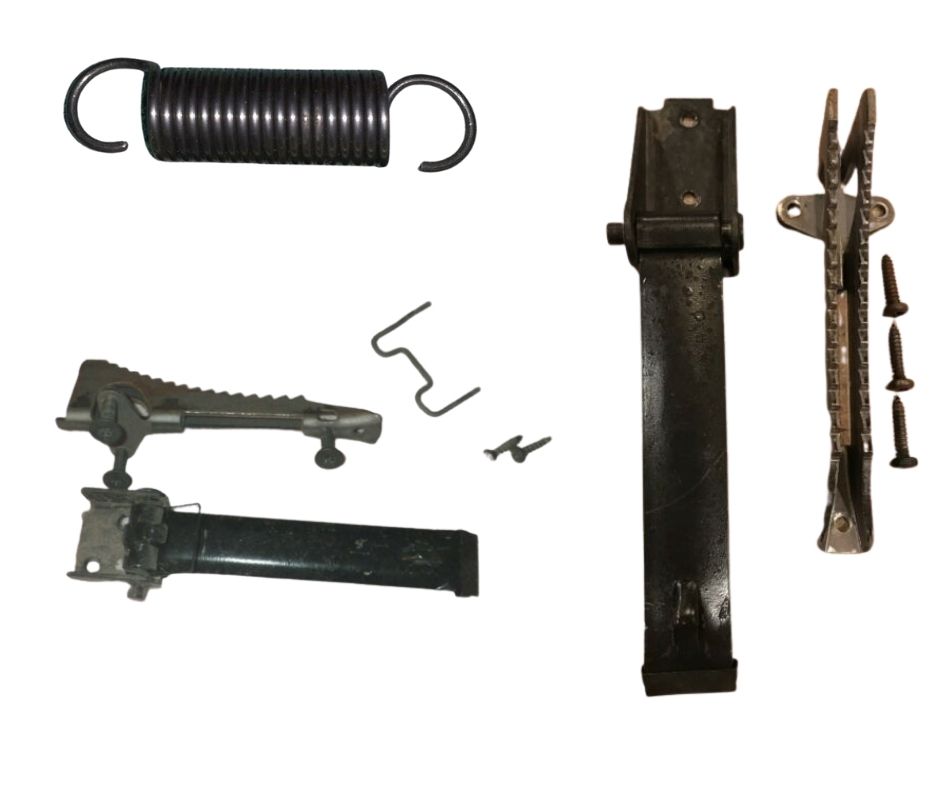
More than likely, the recliner you own will have one of these three recliner backs.
- Locking Lever Back (brackets attached to the sides of the back)
- Bolted Back (accessible through a panel covering up the bolts)
- Locking Tabs or Catches on the Back (locked into place)
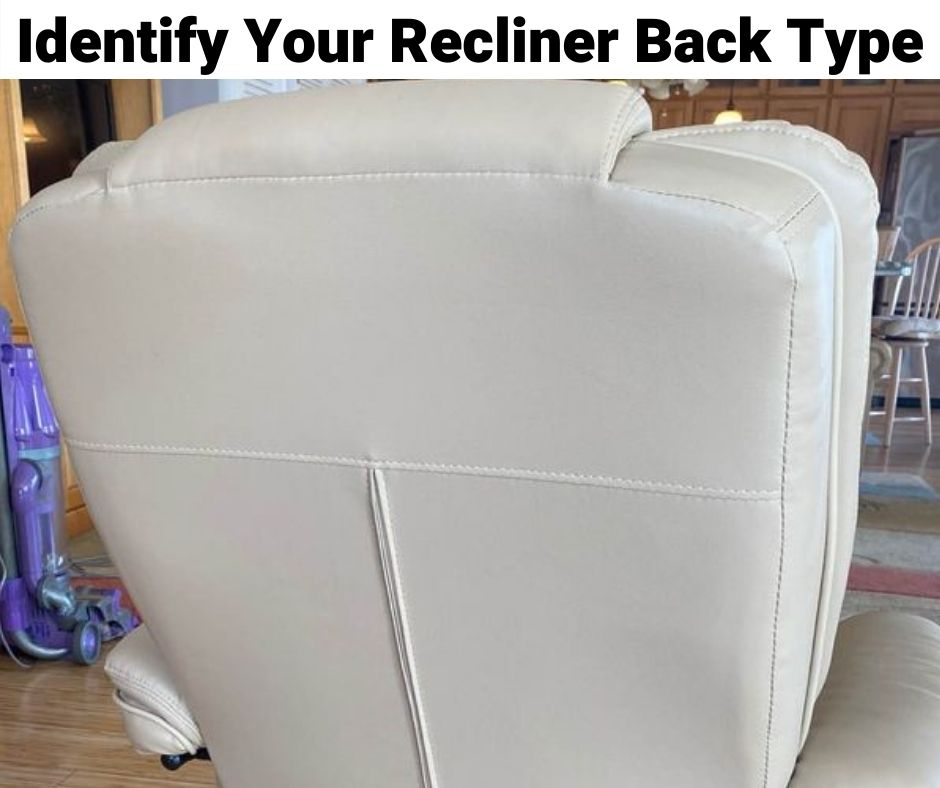
Identify which recliner back you have and then either unhinge it, unbolt it, or unlock it with the basic tools you have next to you. The locking levels should be flipped upwards when removing the back.
Did You Just Find the Problem? Loose Attaching Hardware
If you are lucky, you may have just stumbled across the problem already. Once the back of the recliner is off, check all of the attaching hardware brackets and tabs. If they are loose, tighten them snugly because if the problem was too much play and shifting in the recliner back, tightening the hardware could ensure all that shifting stops.
Does Your Recliner Back Have a Mind of Its Own? Probably the Cable
If the problem with the recliner is it doesn’t want to recline or it reclines too much, the cable is probably the item that is causing you all this trouble. The bad news is that it will take a bit of time to fix, but the good news is that it can save your faithful recliner and you won’t have to pay for a repairman.
How to Repair the Cable
- Flip your recliner completely upside down so the bottom is pointing up towards your ceiling.
- There will probably be four bolts that are located on the bottom of the footrest. Remove them at this time.
- There should be another two bolts fastening the squab to the underside of the recliner. Remove these two bolts at this time.
- At this point, you should be able to see the cable that operates the reclining mechanism. It will be on the handle side of the recliner.
- If the cable has become detached and is flopping around free and clear of everything, simply reattach it into place.
- You may see at this time that the cable is fine, but the lever mechanism is being held on by a loose bolt. Rebolt it into place.
- If you get in there and notice that the cable has snapped, you can simply remove the cable and replace it with a new one. It might take you a couple of days to locate one, so be patient and don’t throw in the towel. As you can see on Amazon, they are available for close to ten dollars.
- Most of us like to have a visual to go along with written directions, so here is a great video demonstrating much of the action.
Place the Chair Back into Place Once Again
Once you have it fixed and want to try it out, reattach the chair back into place. You will be attaching it the same way that you took it off in the first place. It will be either through the locking lever brackets, the bolts, or locking it back into place.
What Is the Worst that Can Happen?
If the recliner back is giving you such a hard time that you are thinking about putting it out on the curb with a sign saying Free to Good Home, you might as well take this opportunity to try to fix it on your own.
What is the worst that can happen? You are already thinking about getting rid of it. If you take it apart and feel you are in over your head, reach out to a friend that is more mechanically inclined. Either way, it will inspire you to tackle more DIY projects down the road.
[hfe_template id=’7376′]